If your house is similar to mine, where your children are slightly obsessed with scratch paper – then this art is for you! The absolute thrill of scratching off the top colour to find another nestled beneath is akin to magic for our little and big children. However, the cost of these magical papers is quite astounding…so, let’s make our own!
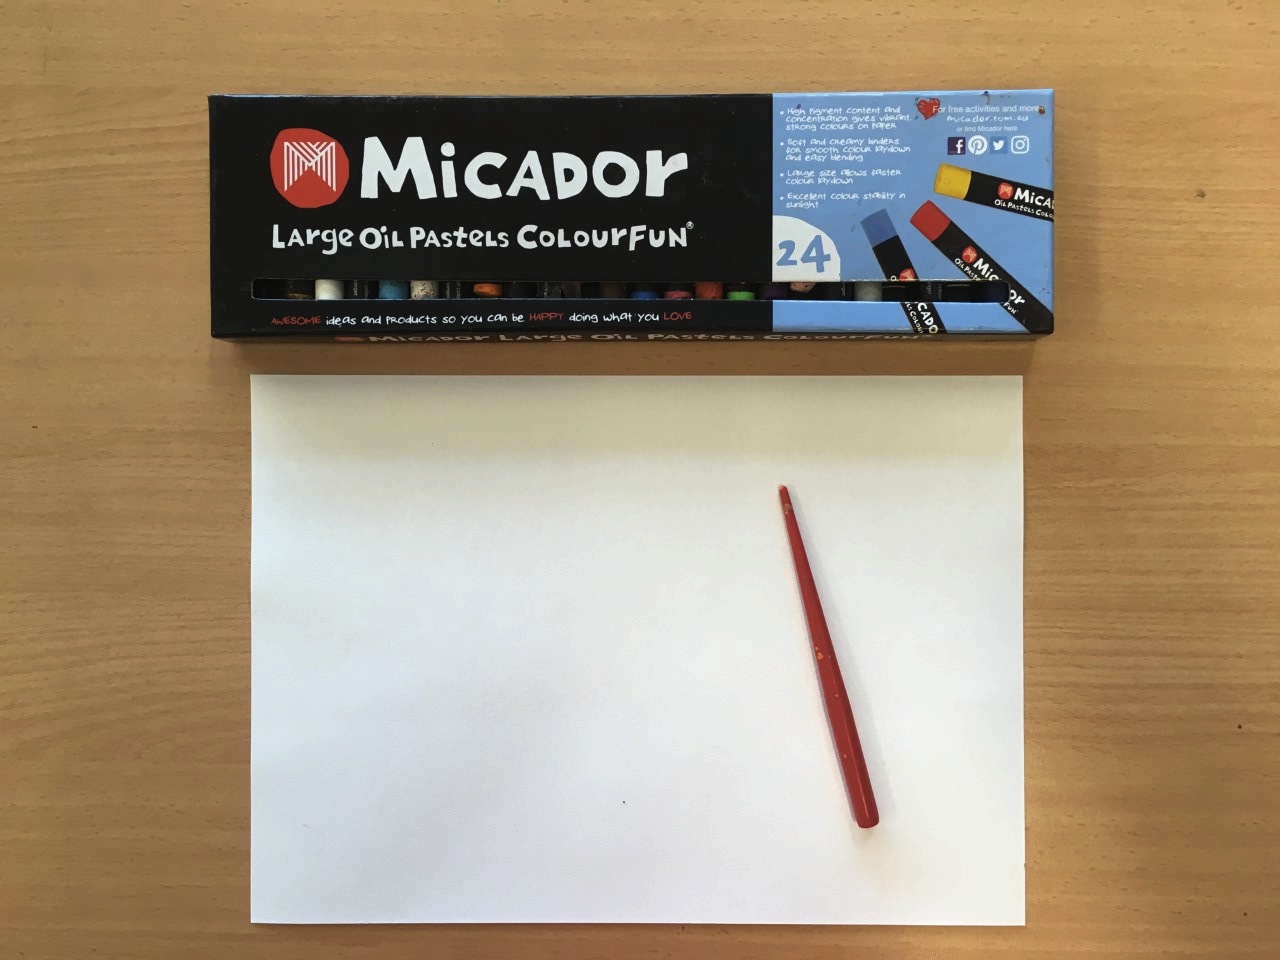
You will need:
- A4 paper
- A scratch tool (or something pointy – I use the end of a paintbrush for my kids when they are fighting over our scratch tool!)
- A pack of Oil Pastels – I used Micador, but any brand will work. Office works sell Faber-Castell and Staedtler oil pastels for under $10, as would most stationary stores.
- Great arm muscles!!!
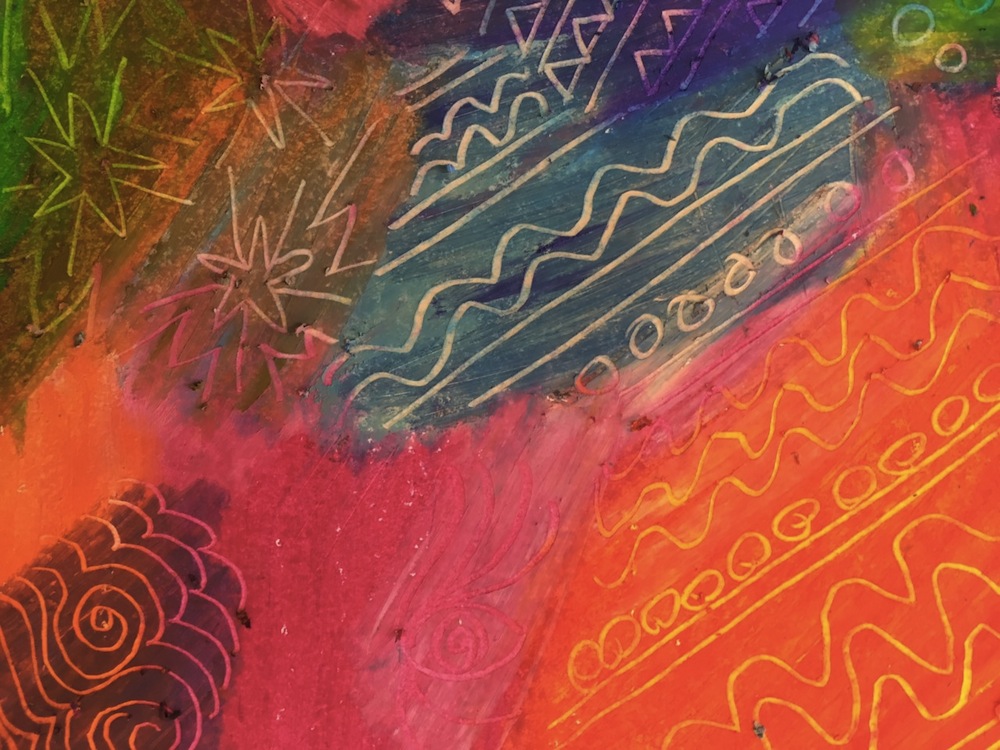
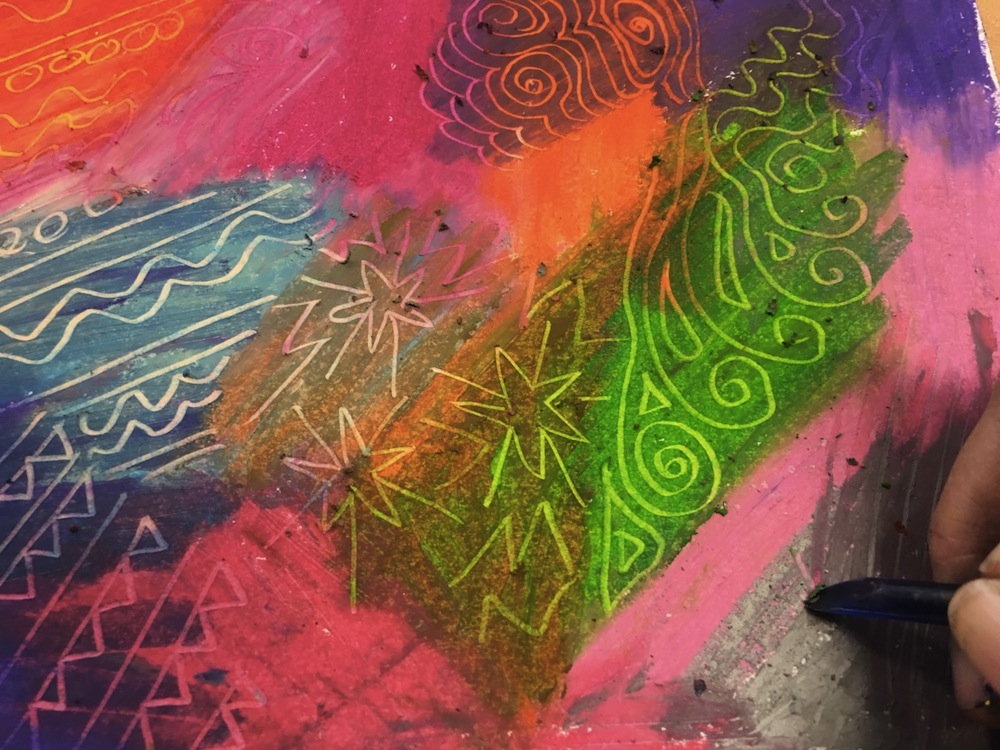
The arts learning is about layering, as you will need to layer dark over light colours, for this to work really, really well. Apart from that, the process is simple!
Begin by creating patches of lighter colours all over the page. You will need to press really hard and make the pastels look thick, not showing any white from the page behind. It doesn’t not matter where you put the colour, or the shapes that you make…there are NO mistakes in this art room. Plus, we love mistakes in art as they generally create a whole new way of thinking and doing.
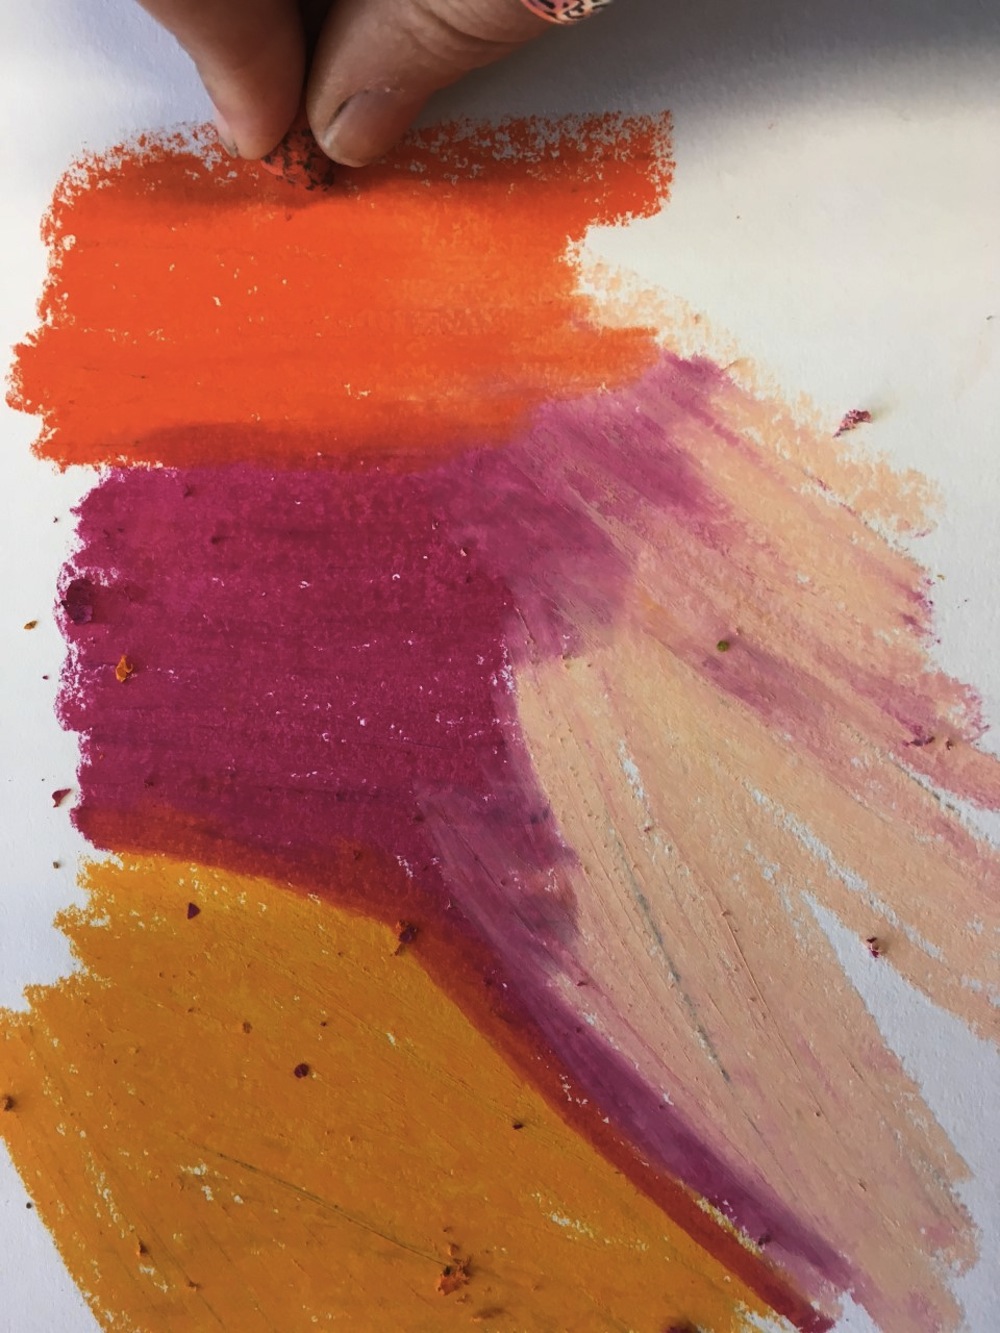
Once you have a thick layer of colour on your page, you can go over all (or some) of the coloured areas in another layer of oil pastels. Yes, you heard right…put a darker or complementary colour straight over the first layer! Crazy…I know!

Once this is done, the fun begins! Using your scratch tool, or the like, you can begin to create patterns on the double layered areas of your artwork. If you don’t like the pattern – guess what? You can go over it again and re-scratch. Amazing right!!
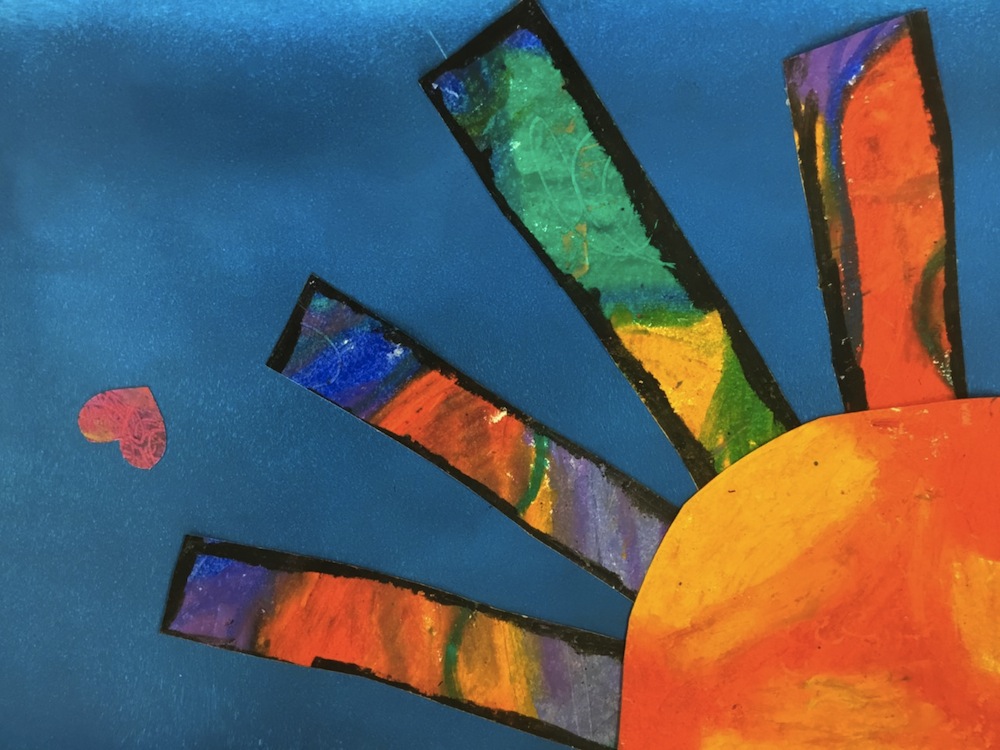
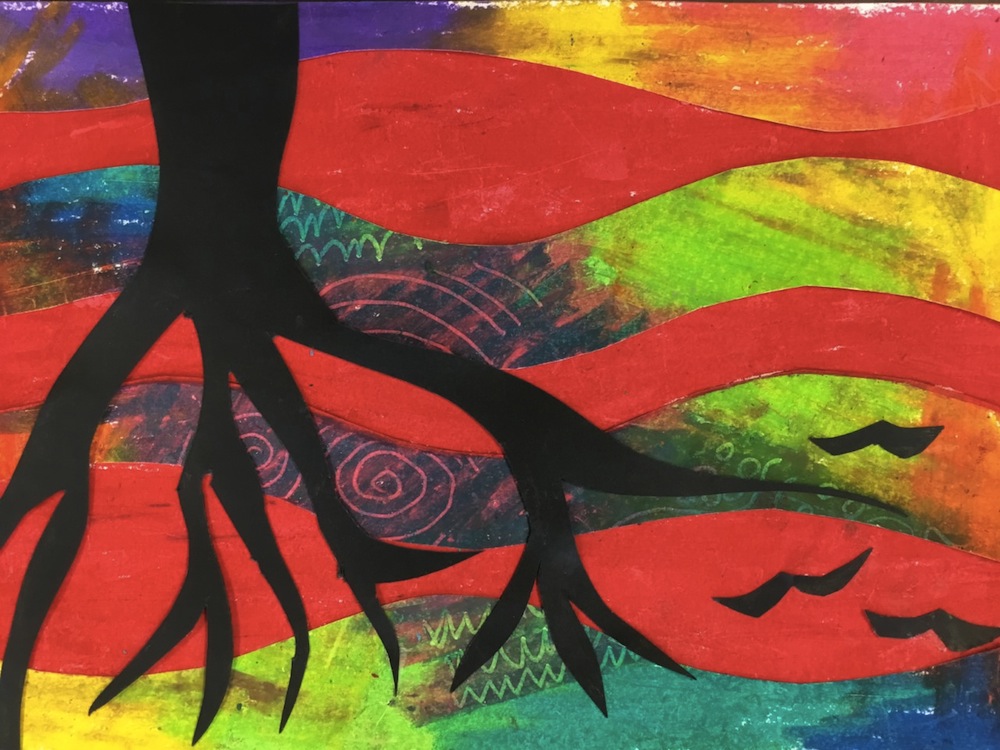
In the art room we can use this ‘magic paper’ for collage art, which is bright and funky. I added a couple of amazing art works for you to look at…
Enjoy your home-made scratch paper people!
You might also be interested in
-

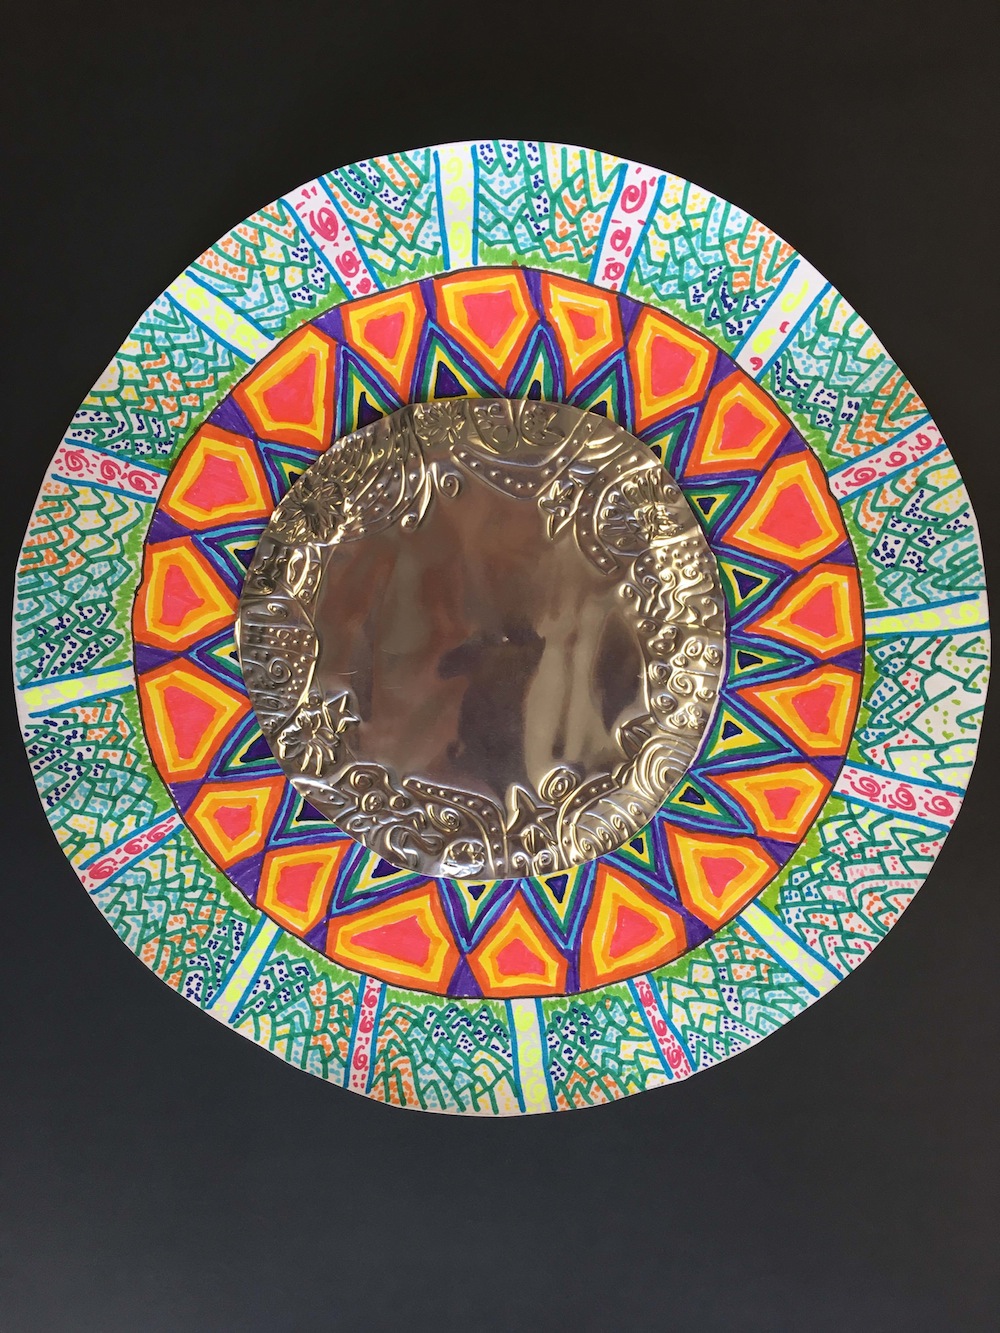
We look all over the world to find inspiration for our art. In the Mexican markets, in the brightly coloured stalls, you can find mirrors made from tin foil. So, in true inspiring fashion you can create these beautiful pieces of art with your little ones. If you are thinking about explaining the art elements to your little one, then we are using lines as repetitions and patterns! You will need: Embossing foil (found at art stores) or you can alfoilNewspaperPencils and textasCompassScissorsGlue (a hot glue gun is best if available)A3 paper (to be cut square)Imagination…… Once you have all your equipment you can begin by creating a circle with a compass on the tin foil. You can also use a round lid, as long as it is not too big. Continue by creating two or three more circles, larger than your tin foil on your A4 piece of paper. Using a pencil, you can begin to carve in a design on the outside of your tin foil. You can use your imagination to create any organic or geometric shapes, they all look amazing! Please be mindful that the edge may be sharp. Use newspaper under your tin foil so…
-

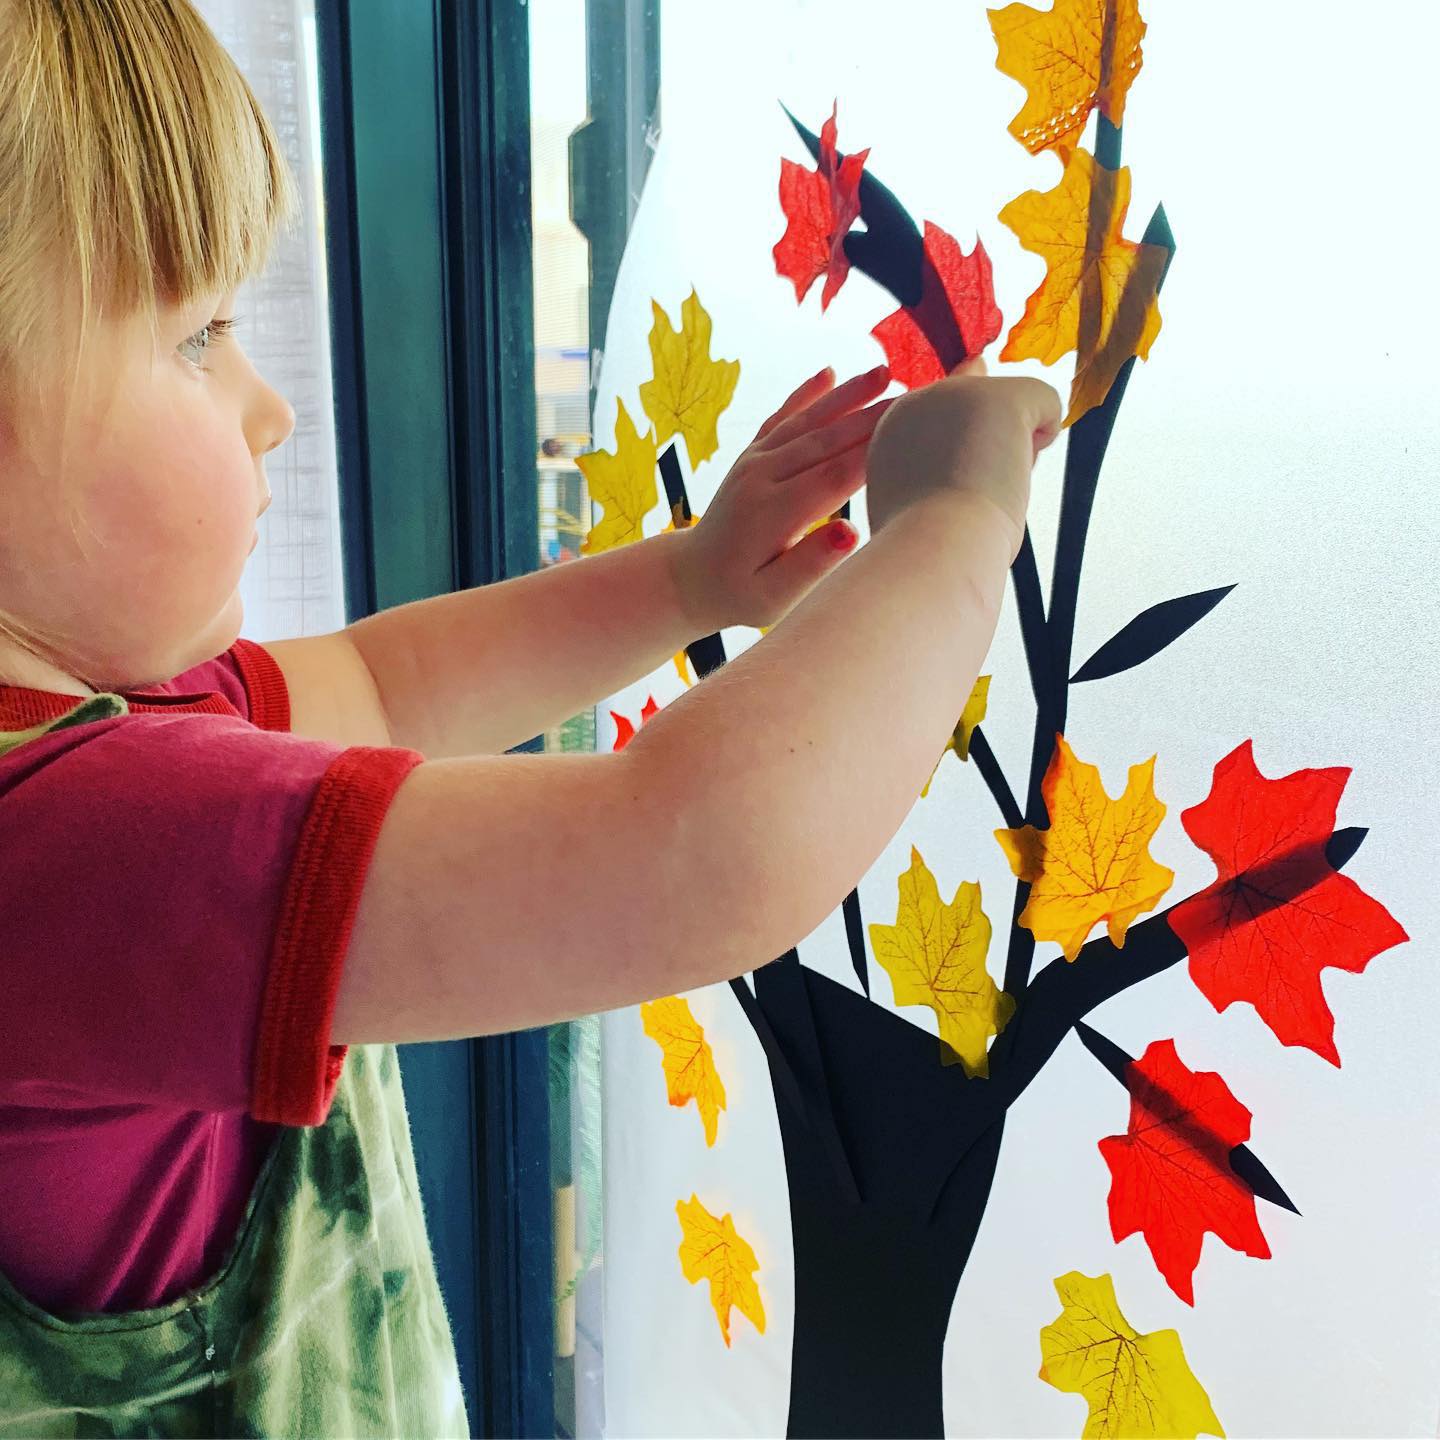
The leaves are beginning to slowly change colour, which can mean only one thing, autumn is on it’s way! Autumn is the season of colour, and by far my favourite. I remember I used to go out of my way to step on a crunchy leaf, and for some reason it still brings out the child in me! These activities have been created with young children and preschoolers in mind, but they’re equally as satisfying for older age groups too (ahem, even really big kids at heart!). They’re easy and quick to put together and especially great for keeping those toddlers busy while you get something else done, or better yet, sit down and have a cuppa, or read that magazine you bought three weeks ago that’s still sitting on the kitchen counter! Contact Art You will need: Clear contactBlack card or brown paper, cut into a trunk and then some branch shapes. Homemade leaves (you could pre paint/fingerpaint some autumn colours with your child and cut it into leaf shapes)Or craft leaves from a variety shopSticky tape To begin… Cut some contact off the roll and round off the top. Then pull off the paper backing. Stick this (with…
-

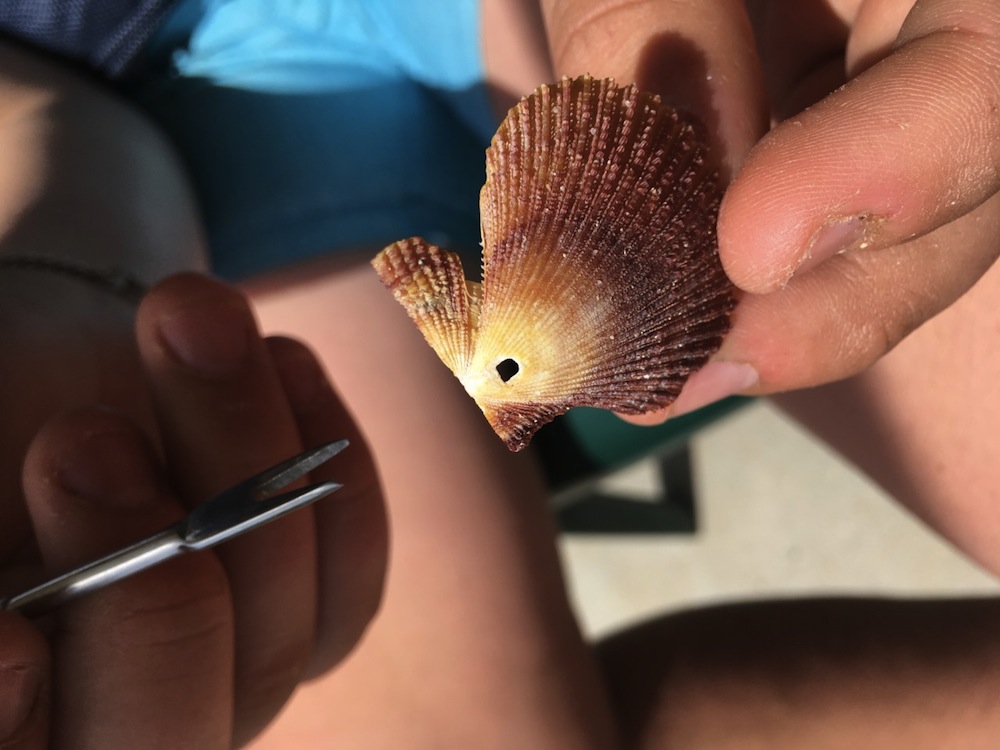
We explored Mindfulness in Art with our last instalment on Kids in Adelaide with Nature Mandalas, with objects collected from the beach and the dunes. Thanks for the great images that came in with your beautiful mandalas…..amazing!! In this instalment of Mindfulness in Art we are using all the beautiful shells we collected for our nature mandala to create a mobile. A project like this is even more satisfying when you are on holidays, creating beautiful memories and you can bring home an artwork to hang on your walls forever! You will need the following: * Shells from the beach – it is so much easier to collect shells that already have a small hole already in them…. * Small metal skewer for poking holes, or even a thick darning needle or tiny screwdriver (Mum’s you will need to do the hole creating as this is an extremely hard task….not so much mindfulness in this part, just patience!!!) * Piece of drift wood * Fishing wire * Scissors Have all of your beautiful shells cleaned and dry. Talk with your child about the type of pattern you would like to create with your shells. We used 4 lines with three…