A girlfriend recently alerted me to Khloe Kardashian’s pantry and I wanted in on this pantry porn!
I was drooling at the labels, the OCD order, the matching water bottles. A dash to Coles the night before to buy salsa for Tuesday taco night in the cold only to find the salsa the next day stuffed behind a hundred other things … also confirmed my need to be more organised. I want some Pantry Perfection to make it look pretty, organised, zen and not a complete mess!
Not to do anything half way – I called an actual Pantry Organiser! Don’t judge me… I needed to feel organised in some aspect of my life and if the pantry was it then so be it.
I learnt a few tips with the professional organiser and some realisation at the same time on things I was doing wrong along the way to have it in a state of mess most of the time.
Weather you treat yourself and get someone to do it (are you still judging me) here are some tips I learnt along the way… oh and my number one tip … don’t tell your husbands ladies! Just do it….
This is not a sponsored post or paid advertisement however I would like to acknowledge Sarah from Sarah’s House who was my Pantry Guru and images below are from Sarah’s site and Iryna Federico an Adelaideian Home organisation hobbyist whose Instagram I drool over most days.
1.Pantry Purge
Take everything out. Yes, EVERYTHING. Get rid of anything that’s out of date and clean the shelves. Do you know how much stuff I found at the back of the cupboards? Hello Halloween Lollies circa 2016 and now …..Goodbye!
Set some time aside (when no kids are home) and allow an hour or two to empty out and chuck the random items out.
This is a great step before your makeover. Biggest random I found was an M&M dispensing statue that was taking up room and no purpose for day to day use and at least 5 broken useless appliances – all clutter – all in necessary space wasters.
2. Go Hard or Go Home
If you have decided to give yourself a Pantry Makeover – buy all the matching containers, baskets, trays at once. This may make you cringe at the expense in one go but you get the finished product and outcomes. I used to buy a little here and there but it was never done.
I swallowed it and went hard – give me all matching! This may seem silly BUT I save so much time looking for things, navigating things, nothing is going to waste and I can see everything in my containers. The clear containers from IKEA are my favourite as I can write on them what is what ! The total for all my matchy macthy things came to around $150.00 – not bad I thought.
and remember …..then chuck out all the containers that are cracked, old, gross and serve no purpose… they will creep back in there if you don’t. Clutter attracts clutter. period.
3. Empty packets out
Almost everything in your pantry is better off out of its packet and in a clear container, bottle or jar. It will stay fresher (which means less food waste), you’ll know what you have, and you won’t have packets creating a mess and extra rubbish.
Have a good look at what’s in your pantry and work out what size, shape and how many jars and containers you need.
Glass is a good choice as it easier to see what’s inside, it’s eco-friendly, durable, looks good and it’s a non-toxic storage option.
4. Label it or loose it!
We label everything for our kids …but we forget to label our goods. Spend less time looking and sniffing & just have everything ready to go with nice organised labels. There are TONS of ideas online on how to make labels, downloads for templates or whatever your looking for. Just google and take your pick or try ETSY for some inspo!
I decided to purchase a set of labels from Words She Wrote so again everything was there and ready to use and I did not keep putting off making them etc.. I am also hugely time poor plus I wanted to make it nice and pretty….:)
5. Create a kid zone
Sticky fingers were finding the “sometimes” food a little too easy of late so now we have a some different Kids Zones in the pantry… trust me my pantry is not big … its actually pretty small but you an still zone.
On the lower shelf is the self serve zone for healthy snacks they can access and really at anytime plus it empowers independence for getting snacks, packing lunch boxes etc
On the upper shelf is the sometimes food we just need out of eye sight so if they cannot see it we do not get 100 questions about cookies for breakfast! Plus if you follow the throw out of packets suggestion eliminates some visual spotting for the younger kids.
Then there is what I call the “Party Bucket” where you have your food colourings, decorating bits and bobs, once every so often paraphernalia all in one home like a basket or tub.
In summary ; my little mid life crisis moments result in me doing things like getting pantry organisers to come and fix my mess.
You know what though… I feel more organised. I know I have saved money not buying things I already have and of course I am saving time. Every parent’s need is for more minutes then I can honestly say I found a couple more every day with this little splurge.
Now…. shall I combat the fridge?! Look at it…. its a rainbow unicorn fridge (but it really does exist)
You might also be interested in
-
Here's my fail safe recipe for perfect pancakes. They're not the healthiest ones, or vegan, or full of superfoods, but they're easy and they work.....every time. Ingredients 1 1/3 cups flour (you can use spelt if you want)1 cup milk1 tablespoon baking powder1/4 caster sugar1 egg2 teaspoons vanilla (optional)Butter for the pan Method I have a Magimix CE so I just throw everything except the butter into the bowl and mix for about 1 minute and it's done. If you don't have a Magimix or a Thermie or something similar it's still super easy.Put flour, baking powder and sugar in a bowl and whisk. Mix your egg, milk and vanilla in a separate jug and whiskMake a hole in the dry ingredients, pour the egg mixture in and mix to make a smooth batter. Heat pan to medium heat add some butter and pour in your pancake mix as big and as thick as you like them. Cook for around 1-2 minutes each side. Throw in a flip if you want to impress the kids. Serve them up with your fave pancake toppings. Lemon and sugarHoneyBerries and yoghurtBacon and maple syrupBanana and nutella
-

Need a recipe your kiddos will LOVE making? One that they can get fully immersed in and creative with? The awesome Adelaide-based folks at Cook n Create have one of our favorites here for you! We road tested (see what we did there?) the recipe for you and can confirm it's a great one and would make a fab Christmas gift for teachers and friends. What you will need (This is the full recipe but if you want to make less, you can simply half the recipe – I often do this or I will munch away on the extras!) 300g Digestive biscuits (You can use others of course but digestives work the best)100g coco pops270g unsalted butter400g Chocolate (You can use white, milk or dark!)6 tbsp golden syrup150g marshmallows That’s the basic recipe BUT we love to add: 50g popcorn100g mixed nuts100g mixed dried fruits You can get creative! Method Break up your chocolate into a large glass/heatproof bowlFill a saucepan with boiling water and place the bowl over the saucepan over a low heat (Make sure the bottom of your bowl isn’t too near the bottom of the saucepan and that you don’t take the bowl off the…
-

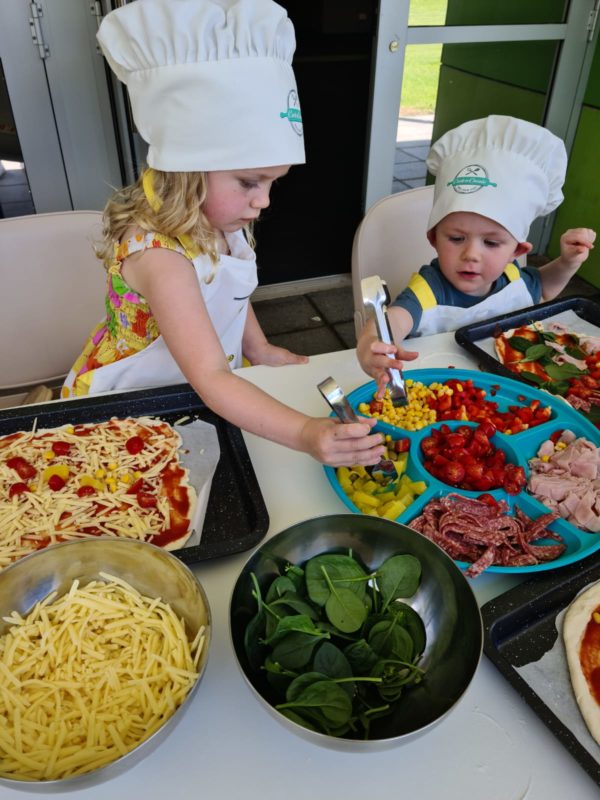
Kids in the kitchen? Some of us love it, some of not so much! But teaching kids to enjoy cooking and eating a range of delicious and healthy Meals is important and starting early helps. This super easy pizza recipe from the awesome Adelaide-based folks at Cook n Create will have you and the kids coming back for more. Toppings are completely up to you and your children so experiment a bit and have fun while at it (ps - Nutella and banana is totally an option for dessert pizza!!) Cook n Create Pizza Shopping List (serves 4..ish) For the yummy dough 300g (2 1/3 cups) self raising flour (some extra for dusting)1 teaspoon baking powder½ teaspoon salt300g (1 1/5cup) natural/Greek yogurt Top Tip: We can flavour the dough (and it’s a fabulous thing to do!!) If you want to do this – what you flavour it with is your choice! Some of my suggestions are: Herbs (fresh or dried – rosemary is yum!), paprika, chili, Cheese (a handful of grated cheese is enough), Garlic powder, seeds, curry powder etc. We like to use a teaspoon or so of dried ingredients to flavour the dough but really it depends how…